
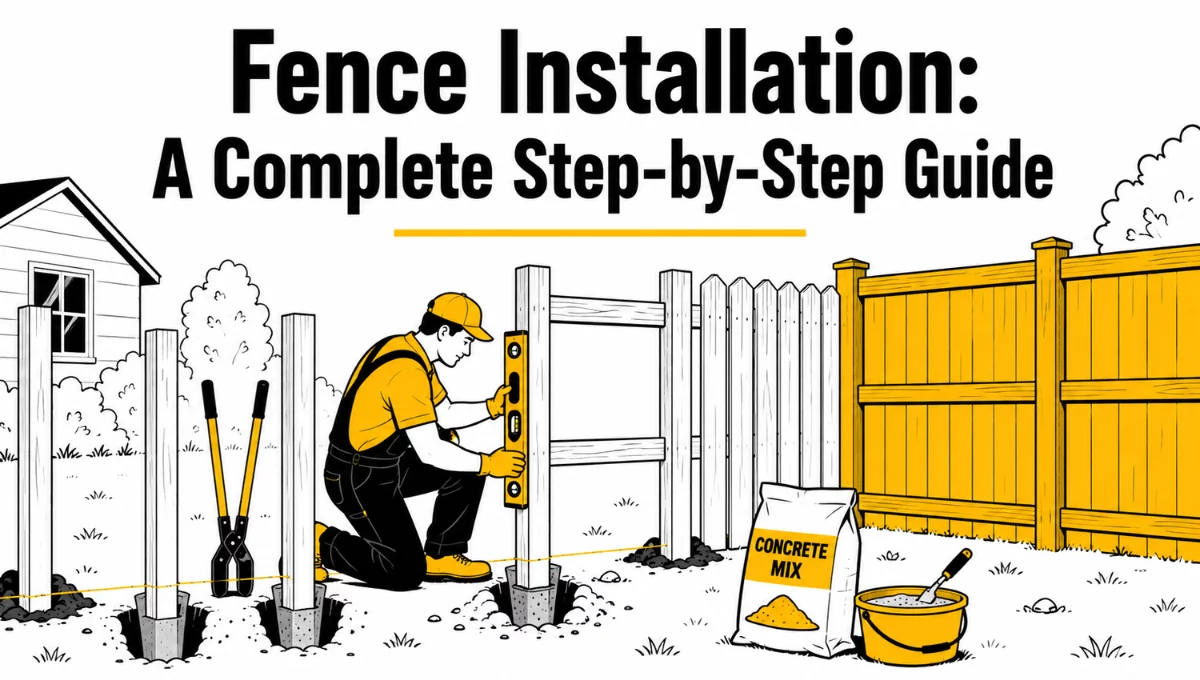
Summary: Planning, proper measurements, and secure post placement ensure that a fence lasts. Long-lasting results from following the right installation and maintenance steps improve the privacy and security of a property while improving its durability and aesthetics.
A Complete Guide to Fence Installation and Setup
Fence Installation Mistakes | Fence Hangers | Installing a Privacy Fence
A fence with proper installation can provide several benefits and increase the functionality and appeal of a space. You can use fences to improve your property lines, keep the family pets or children safe, provide privacy to your garden, and enhance the aesthetics of your residence.
Typically, fence installation may appear easy with a brush of dirt and installation of fence panels on posts; however, this is far from the truth. Measurement, placement, v and some seal-of-approval preparation on a fence line is required to have a fence that is sturdy, safe, and aesthetically pleasing.
This guide will give you an idea of what to expect throughout a fence installation as part of home improvement, with preparation tips and how to avoid the typical pitfalls in a fence installation.
Step 1: Determine the Purpose of Your Fence
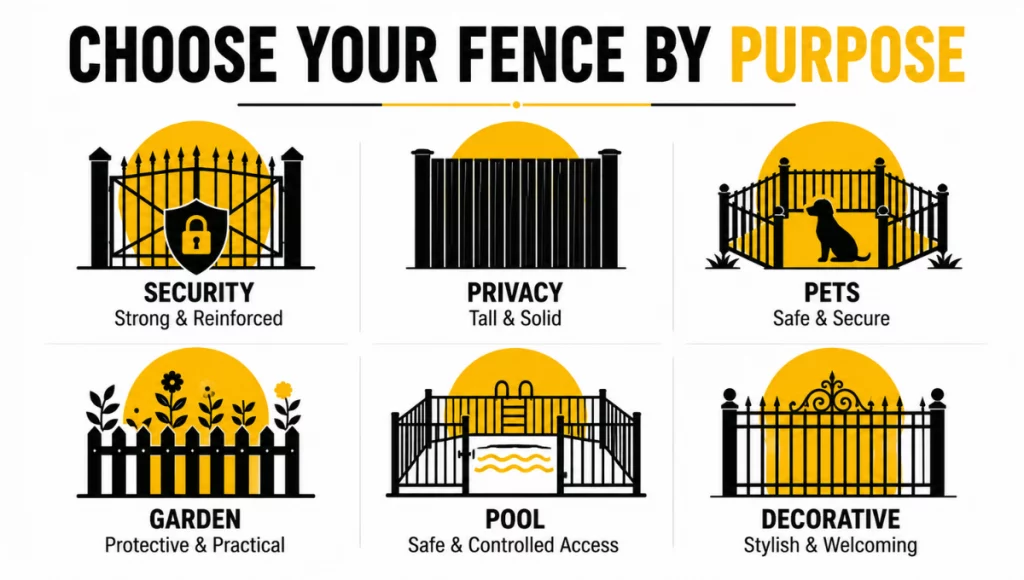
Once you know why you want the fence, you can determine its height, material, form, and placement. Security fences require stronger material and more reinforced gates. Privacy fences will be taller and less noticeable. Decorative wood fences are shorter and are more for style than privacy.
When installing a fence around a garden, pool, driveway, or pet area, you will need to consider both spacing and height. Knowing the primary reason you want your fence will help you choose a design and save you money by avoiding unnecessary extras.
Step 2: Choose the Right Fence Material
Fence materials vary in appearance, maintenance, durability, and cost. There are different types of fences you can choose from:
- Wooden and vinyl fencing are both popular. Wooden fences are an appealing choice because they can be painted or stained many colors and/or be built in many different designs. However, wooden fencing must be treated regularly to prevent moisture and weather damage.
- White vinyl fencing is similar in that it requires very little maintenance and is resistant to moisture and rot. Vinyl is also a common choice of material for privacy fencing and fencing on residential property.
- Metal fencing is a durable, secure choice, especially metal fencing made of aluminum, steel, or wrought iron.
- Aluminum fencing is lightweight and resistant to corrosion, and steel offers a greater strength option.
- Chain link fence is a good choice for a fence that will fill the desired boundary control and is very affordable.
- Relative to wood, a close choice that combines appearance, cost, and maintenance is composite fences. Climate, cost, maintenance, and appearance are all factors to keep in mind when selecting your fence.
Step 3: Check Property Boundaries and Local Requirements
The location of the fence along the boundary of your property is the first consideration in the installation process. The fence services that encroach on your neighbor’s territory will almost certainly generate a boundary dispute. This may even require a fence relocation. Be sure to review your property survey or hire a professional if the location of your property boundary is unknown.
Find out what local regulations and ordinances apply to fence construction. There are normally restrictions on construction, including building permits and building materials, and they may also dictate fence height, position, construction material, and proximity to street and sidewalk areas. Special provisions may be in effect for swimming pool fence construction. All of these considerations can save you a lot of money in subsequent unneeded changes.
Step 4: Locate Underground Utilities
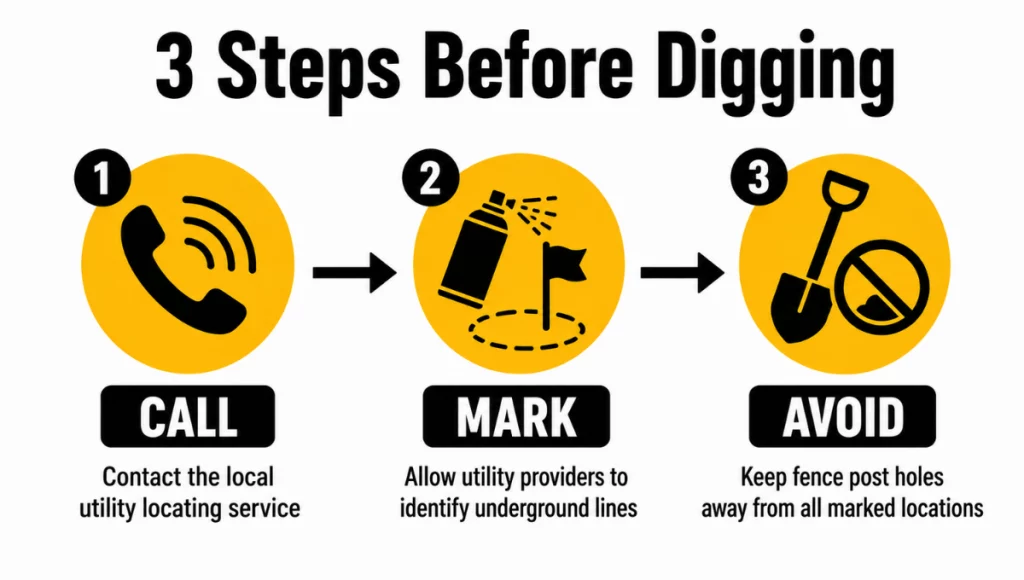
Always find out where the utility lines are located under the ground before putting your first shovel in the ground to dig post holes. You don’t want to dig holes and destroy water pipes, gas lines, communications cables, or drainage systems on your property. When you damage an underground service, you could seriously harm yourself and others and be forced to pay for the damage.
Before you start digging, call the local utility line locating service. Utility companies are legally required to identify the location of their services and mark the area above them. Avoid posting in the marked locations.
Step 5: Measure and Mark the Fence Line
Fence repair and installation requires precise measurements. To begin, all corner points need to be determined. Once those locations are known, string or mason’s line can be used to tie the corners and act as a straight line guide for the fence.
Once the total length of the fence line is known, all other components will have a total number. The placement of fence gates needs to be known as well. Gate posts need to be reinforced even more than others, so make certain all gate posts are accounted for. Precise measurements are critical for the success of the install. Any error in measurement will be more visible once the majority of the fence install is completed.
Step 6: Plan Fence Post Spacing
Fence posts need to be positioned correctly. The spacing of posts is affected by the material used and the size of the fence panels. The posts of many residential fence systems are spaced about 6 to 8 feet apart. However, you must follow the instructions from the manufacturer.
Align the string line with each post location. Remember to add corner posts, less posts on the opposite side of a gate, changes in the direction of the fence post spacing, and unbalanced terrain. Space your posts before you start digging to avoid unnecessarily large sections of fence posts and to minimize cuts in fence posts.
Step 7: Dig the Post Holes
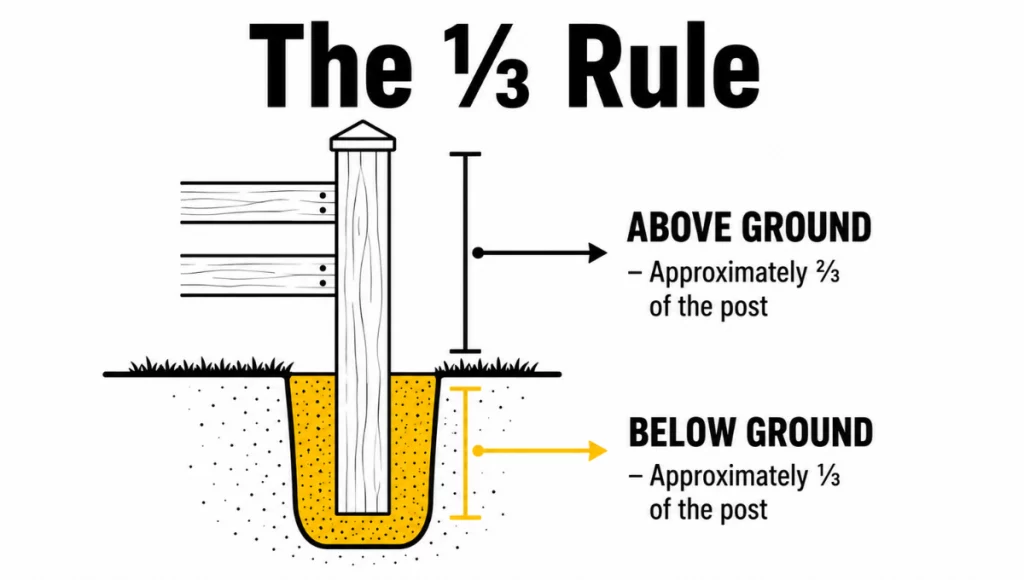
Once you have selected your locations, you can begin digging. Post holes can be made using an auger or a post-hole digger. There is no hard and fast rule for the placement of post holes. Local climate, soil consistency, and the prevalent frost depth will dictate the depth of the holes.
A fence post will generally have one-third of its length buried. Taller steel fences and fences in windy areas will require the post to be buried deeper.
The hole should be sized to provide room to surround the post with concrete or a compacted material. Post depth should be uniform. Non-uniform post depth will result in a poorly aligned fence line and a weakened fence.
Step 8: Install a Fence and Secure the Fence Posts
Posts are the foundation of your fence. This step shouldn’t be rushed. Before installation, a commercial handyman leans the post against the side of the hole to confirm the post is vertical.
Concrete is usually utilized to secure fence post guards. Follow the instructions on the bag to determine how to mix the concrete. Make sure to secure posts properly per the manufacturer’s instructions.
When the corner and end posts are in the correct location, align posts along the line by using a taut string. Check every post before setting the concrete. Heavy gates and panels should be added to your fence after the posts are fully cured. Posts that are leaned on too early will move out of place. With our professional fence repair services, we can fix broken, leaning, or otherwise damaged fences, giving you the peace of mind of having a safe and strong fence
Step 9: Attach the Fence Rails
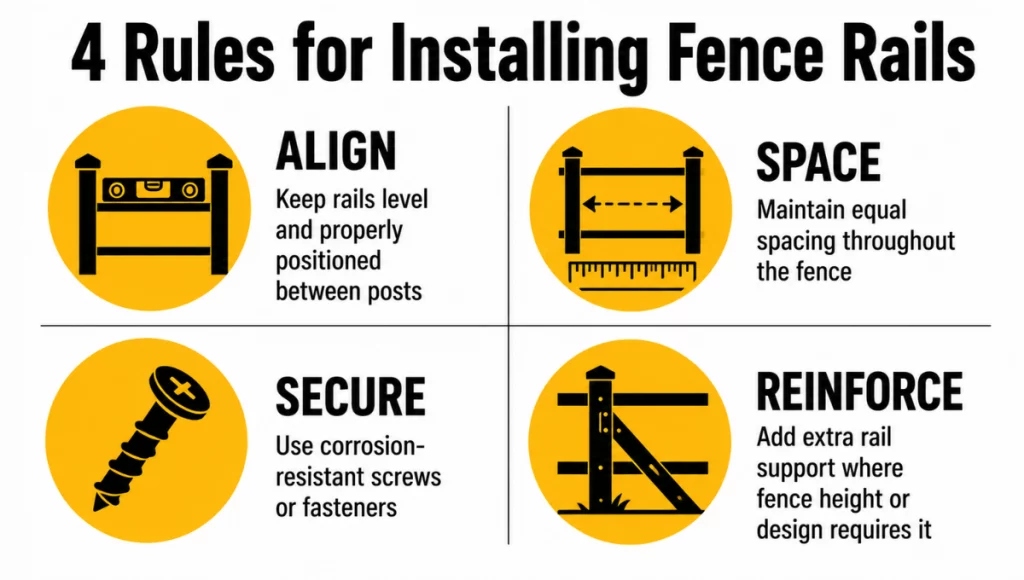
Rails span the length of fence sections and connect the post assemblies. Horizontal rails are typically affixed to the upper and lower post assemblies. Fences that are over 6 feet may also require a center rail for added strength. Fasteners need to be corrosion-resistant due to the outdoor exposure. Maintain an equal rail spacing along the fence line for aesthetics.
For fencing along a slope, one of the options is step fencing, where the posts are stepped vertically along the slope. This fencing is cheaper to build than fencing that follows the natural slope of the ground. This detail needs to be carefully considered, as it can dramatically improve the overall appearance of the fence.
Step 10: Install Fence Boards or Panels
With the posts and rails in place, the rest of the fence can be added with the help of marking tools. Some companies use modular fence sections. These sections of fence are ready to install and have several boards connected. Individual boards allow more flexibility for irregularly shaped areas that may have a slope.
To begin, start at one end and go board by board until the fence is completed. Always look at each section with a level as you complete the fence to ensure alignment. If you wait to check the alignment until the fence is completed, it may be more difficult as the sections will become more rigid.
Space successive boards consistently if you wish to incorporate a gap in your design. For privacy bamboo fencing, you can also stack them slightly overlapping for a style of choice.
Step 11: Install the Gate
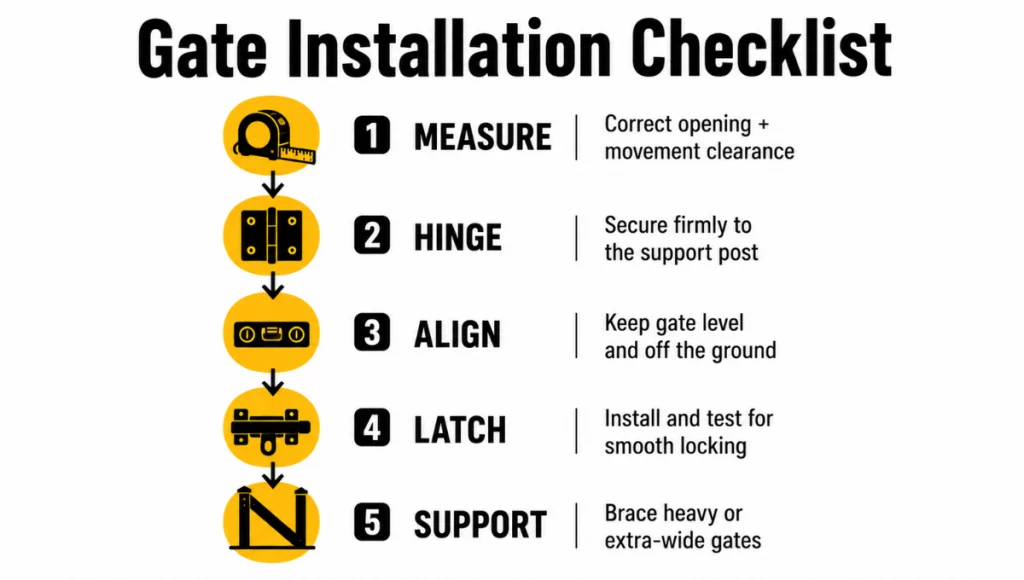
A gate needs support because of the stress from frequent use on the posts. First, you want to get the opening between the gate posts exactly the same size as the gate. You want a bit of space so the gate is able to move with no issues.
Get some hinges and screw them on the supporting post with the help of fastening tools. Once the gate is flat on the ground, it should then be able to swing without scraping the ground. Place a latch on the opposite side. It is probably best to get the latch and test it several times so you don’t regret not testing it later.
If the gate is either really wide or heavy, it is recommended to use some sort of support to keep it from drooping over time.
Step 12: Check the Entire Fence
With the help of a commercial handyman, inspect the finished installation. Check the fence from several different perspectives, such as checking different fence materials. Check for leaning posts and/or panels that are not even, have loose fasteners, or other panels that differ in height.
Check that all gates open and close properly. Make certain that screws and nails as well as all brackets and other hardware, are all secure. Sharp edges or other exposed fasteners should be addressed, especially if children or pets will access the area. Small adjustments to correct defects immediately will keep bigger problems from occurring later.
Step 13: Finish and Protect the Fence
The finishing process depends on the fencing material. Exterior-grade stain, paint, or sealant can help protect your wood fence from moisture penetration as well as cracking, discoloration, and weather-related deterioration.
Pressure-treated lumber also needs to be dried before finishing. Your metal fence may need touch-up painting, and all your vinyl fences may need is a water and mild soap wash to clean them. A little maintenance can really help the longevity of your fence and improve your curb appeal.
ProHandymanNow– Trusted Handyman Services Built on Quality and Care

At Pro Handyman, we’ve mastered the perfect combination of professionalism and service to take all the stress out of every project involving your home repairs and improvements. Our team is efficient while working quickly. We maintain a high level of respect for your property and provide updates throughout the entire process. We aim to strengthen our relationships by building trust through honesty and reliability, so that you’ll continue to come back knowing you can trust our work.
Final Thoughts
Installation of a fence requires preparation well before the first post gets placed. Choosing proper materials, determining and verifying property boundaries, researching the regulations, measuring the space, and making sure the posts are securely placed in the ground are all part of having a strong and attractive fence.
While some fencing projects can definitely be classified as DIY, full attention to both vertical and horizontal alignment is necessary throughout the process.
A fence provides years of privacy, security, and attractiveness. Careful attention during the installation process and regular maintenance of the structure result in a long-lasting and attractive outdoor fence for the home. Contact us today for professional and reliable home repair and improvement services.
FAQS
How Far Do I Need to Bury My Fence Posts?
Depth of post termination matters with respect to height, weather, soil and local regulations; but as a rule of thumb, consider burying one third of your post length. With taller posts, wider spans and/or higher wind sectors, you must account for greater soil movement.
How Long Should Fence Posts Be Left Without Panels to Cure?
This varies most with the product and environmental conditions, but a good rule of thumb is that most products will be firm enough to the touch for light use in 24 – 48 hours. To be completely safe, you should always follow the recommendations provided by the manufacturer.
What Materials are Least Intrusive to Create a Fence?
Among many other products, vinyl, aluminum, and composite are the most popular. Vinyl is durable against moisture rot, aluminum is perfect against corrosion, and composite fencing is wood-like in appearance and requires no regular staining or sealing.
continue reading
Related Posts

Blog Summary: When the proper sizing and style are chosen,

Summary: Choosing the best washer and dryer starts with your

Summary: A complete walkthrough of what it takes to set